Do you live in a relatively remote place where most signals are slow? Then you probably need to learn how to build a 40′ antenna mast.
Antenna masts are among the most practical things you can build at home if you want to ensure temporary or emergency communication.
Whether it is to extend a WiFi connection, improve radio signal, or just to broadcast emergency communications – an antenna mast offers all that.
Here, we’ll teach you how to build one. If you have little to no experience building this type of object, then you’ll love this guide.
What is an Antenna Mast?
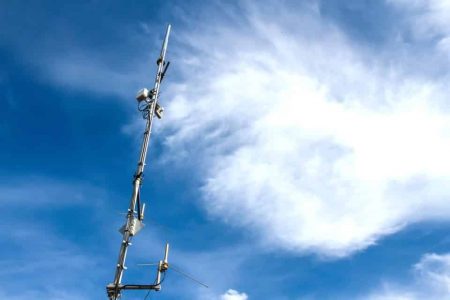
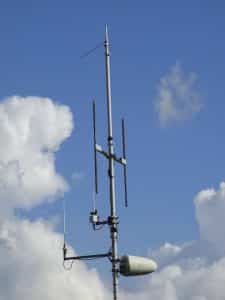
So, what do we refer to when saying antenna mast? We refer to a large piece of wood or metal that holds the antenna off the ground.
But unlike standard towers, masts can be taken down when not being used (if it is a tilt-over design), and put up again when needed.
You could say an antenna mast is like a foldable tower. However, instead of supporting themselves from the ground, masts use cables, guys, and other similar supports.
View what are the top brands of 10M CB radio in our comprehensive review.
40 Feet Antenna Mast Kits
| Brand Name | Detail |
|---|---|
| Easy Up Telescoping Mast | |
| Easy Up EZ TM-50-5 | |
| Wilson Electronics Pole Mount | |
| Hy-Gain Vert. Base Mount | |
| Reese 74329 Trailer Winch | |
| Skywalker Heavy Duty Wall Mount | |
| EZ 32A Ground Mount Heavy Duty | |
| Skywalker Pipe Adapter For Mast |
Why Do you Need To Build Antenna Mast?
If you’re living in a remote place where connectivity is deficient, then you need an antenna.
But because you don’t need something too sturdy or challenging to set up, then you can always use a mast as an excellent alternative.
And if it is a tilt-over model, you can put it up or down as needed without having to leave it up at all times.
Sure enough, you’ll need enough space at home to build one of these (more than 40 feet of terrain available). And if you’re using a standard mast, you will probably need enough space for the cable supports.
If you need the extra connectivity, however, then a mast is your best idea.
The antenna height is very important to know why.
Advantages of a 40′ Antenna Mast
Antenna masts offer a wide array of benefits apart from connectivity. Here are some of them:
- Allow excellent communication advantages in the countryside
- Can be put up and down as necessary (tilt-over masts)
- Increase connectivity exponentially at 40 feet up
- A mast lasts several years if properly installed
Disadvantages of a 40′ Antenna Mast
While an antenna mast may come like an excellent addition to your country house and connectivity, you may find a few things about it underwhelming:
- Antenna masts can take a lot of property space (even more if it is a tilt-over mast)
- The installation can easily take days or even weeks
- It can be costly at first
What Equipment Do I Need to Build an Antenna Mast?
So, you decided that an antenna mast is a worthwhile endeavor to get done. Well, before you start doing anything, you’ll need to gather all the necessary equipment.
Here’s what you will need for the job:
- 1 3-inches diameter aluminum tube of 15 feet
- 2 heavy-gauge 3-inches steel posts at 10 feet
- 1 10mm fiberglass tube of 17 feet
- 1 5mm fiberglass tube of 12 feet
- 2 tube connectors/clamps
- 1 8mm thick galvanized steel cable/wire
- 1 steel wire clip
- 1 galvanized steel winch with a crank (with latching mechanism)
- 1 galvanized steel pulley lever
- 1 steel U-bolt (with washers)
- 1 steel U-hook
- 4 metal rebars
- 1 bag of cement
- 1-inch stainless steel bolts
- 1-inch stainless steel wing nuts
- Stainless steel washers
- A shovel
- A grounding rod (any metal)
As you see gathering all this equipment & materials can take more time and money than you may expect. But it’s all worth it.
Probable Cost of 40 Feet Antenna Mast Setup
The cost of all the materials can go anywhere from $300 up to $1500. Of course, it depends on the quality of the materials you buy and the place you buy them from.
If you have some of these materials at home like the steel and the fiberglass tubes, then you can save about $300-$700 of the final cost. For those who have a roll of galvanized steel cable at home, then the price can go down about $50.
In general, you will probably see no less than $300 in the total initial cost. If you want to use cheaper materials for the base or mast, then you may save between $50 and $100.
But overall, $500 would be the standard cost to make one of these.
How to Build a 40′ Antenna Mast: Step-by-Step Guide
Now that you’re aware of what materials you need for the job and how much you may end up spending, then it is time to start building the antenna mast.
01. Gather Everything
Before you start anything, remember to gather everything and have them at hand reach. This will help you get the job done without wasting any effort or time.
02. Locate the Place of Installation
A mast needs to be installed in a fixed place. That means you won’t be able to move it away once it is installed. So you have to make sure there’s enough place around to install it.
Because we’re going to teach you how to install a tilt-over mast, it is vital to have some flat space available. You will have the mast laying down a lot of the time, so you’ll need enough space for its 40-feet long design.
03. Build the Base
Once you have the location ready, then you can start creating the base. This is where two of the heavy-gauge steel posts will go, as well as the cement.
- First, you’ll have to get rid of the dirt in the place. Shovel up at least 3 feet underground to create it. The hole should also be at least 3 feet by 3 feet in size for a square shape. Or about 3 feet in diameter for a round hole.
- Then you can add the metal rebars by pushing them into the soil in the 3-feet hole. They will act as anchors for the base.
- Once you have the hole with the reinforcement bars, then you can place the 10-feet steel tubes in place. They should go precisely in the middle of the hole. Make sure they go at least 1 or 2 feet into the dirt below.
- Alongside the heavy-gauge steel posts, you can place a metal bar to work as a grounding point. This metal bar should be slightly larger than the hole, so it leaves a small portion on the surface.
- Prepare the cement as necessary. You will need enough to fill up the 3-feet hole in the ground.
- Then fill up the hole with the cement. Remember to place the U-bolt with washers in the hole as well as you fill it up with cement. This is where the pulley will get attached to.
- Be sure the U-bolt is just below the two posts (in the same location as the direction to which you want the mast to lie down), so you can attach the hand-crank winch to the pulley later.
Finish by letting the cement dry up. You should have at least 7 feet remaining from the steel posts on the surface.
Here’s a helpful video for this step:
04. Setting Up the Pivoting Point
Once the concrete is dry, you’ll need to set up the rest of the mast. Because it is a tilt-over model, you’ll have to make a pivoting point. Here’s how:
- Now you’ll have to grab your 15-feet aluminum tube (the base of the mast) and measure the right point for the pivoting. It should be located at no less than 5 feet. Then drill a 1-inch hole in the aluminum tube accordingly.
- Proceed by opening a hole on the steel posts so you can insert a bolt (at 6 feet from the ground, so the aluminum tube doesn’t hit the ground when you put it up).
- Now insert the bolt into the steel posts and the aluminum tube accordingly. You may need help with the aluminum tube here. This bolt will work as the pivoting point on the mast.
- Check that the bolt is tightly adjusted with a wing nut on the other side. Now you can try to move the aluminum tube up and down carefully to check that the pivoting point works.
If everything works as expected, you have a pivoting point ready.
05. Set up the Winch & Pulley
The winch and the pulley will help you elevate the mast. Here, you will have to attach the galvanized cable, the pulley, and the winch together to the aluminum tube.
- Start by setting up the pulley. It should be in the same place as the direction on which the aluminum tube will fall. Use the U-hook to attach the pulley. It should face the location of the winch.
- The winch should be in the middle of the steel posts. We recommend about 3 feet from the ground for easy cranking. Once again, you’ll have to drill a hole, insert the nut, and install the winch accordingly. All winches are different, so follow the specific instruction of yours.
- With the winch ready, you need to attach the steel cable to the winch. This requires just using the winch mechanism (follow its instructions.)
- Then grab the wire loosened up and pass it across to the pulley. Now pull it up and tie it to the bottom part of the mast bottom (aluminum tube). Make sure to secure the wire in place with washers or spacers.
- Finish by making sure the wire is tightened up. Once you find the steel cable is tight enough, so the winch pulls the mast bottom fast, then you’re ready to secure it. Use the wire clip for that.
By now, you have a pivoting point and winch & pulley mechanism ready. It’s time to finish it.
Read more about the car radio installation guide.
06. Finish the Mast
Once you’ve installed the mast bottom (aluminum tube) with the posts and the pulling mechanism is ready, then you can finish the entire mast with the fiberglass tubes.
- With the aluminum tube (mast bottom) lying down, you’ll have to start piecing up the rest of the piece.
- Open 1-inch holes at about 2 feet from the end of the aluminum tube. Then open the same hole at 2 feet into both ends of the 10-inch fiberglass tube and only one end of the 5-inch fiberglass one.
- Attach them together using the nuts and bolts. Also, use the tube
- connectors from the extra tightness. The 10-inch fiberglass goes on the aluminum tube, and the 5-inch diameter fiberglass goes on the 10-inch one.
- Make sure they fit tightly with one another. Test that the fiberglass poles don’t move too much. Otherwise, secure them tighter with whatever you can.
Once you’ve secured the fiberglass poles, then you’ve successfully built a 40-feet mast ready to be used as an antenna. Test it by pulling it up and down with the winch.
Do’s & Don’ts
As you can see, installing a 40-feet antenna mast is not as easy as it seems. That’s why we’re going to help you with some additional Do’s and Don’ts to consider while building one of these:
Do’s
- Use workman gloves when building the mast. Especially when handling metal wires, posts, and tubes.
- Tie up the wire to the bottom of the aluminum tube (mast bottom) with the wire as tightened up as possible. But don’t go too far as to put too much stress on the wire.
- Lower and raise the mast with care. You won’t like to break the fiberglass section.
Don’ts
- Don’t install the mast on a slope or uneven surface. The ground should be as flat as possible will not be stable when lifted up.
- Don’t let the mast touch the floor. Keep it as away from it as possible. Use supports to hold it at a decent height to prevent it from getting damaged.
- Don’t install the mast close to buildings. There should be at least 10 feet of distance from the base of the mast from any construction.
40′ Antenna Mast Maintenance
Maintaining a 40-feet mast may seem like an easy job – but it’s not. There are several tips you can follow to increase the lifespan of the mast:
- Try to cover the winch and cable from the elements when not using. Even though galvanized wire and stainless steel tend to be quality materials, they can also corrode with too much exposure.
- Try not to leave them with direct contact with the floor or flopped freely, especially in dirty or moisty places. Hang the fiberglass parts from a ceiling or build supports, so it hangs at the same height as the pivoting point. Otherwise, you may experience bent fiberglass or corroded material.
- Apply oil on the pivoting point from time to time. This keeps the mast going up and down smoothly.
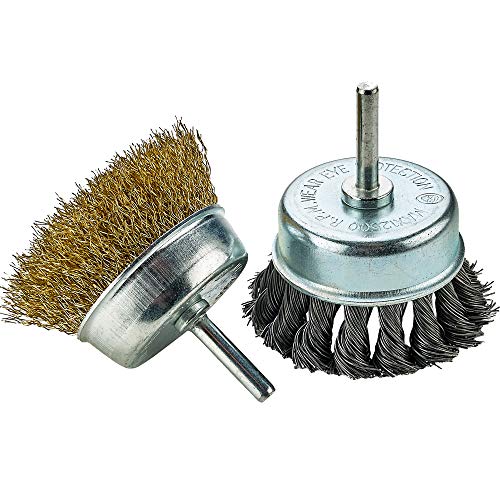
- Remove any type of corrosion using a steel brush or something similar. Do this every 1 year or so. Here’s an example:
Conclusion
So, did you learn how to build a 40′ antenna mast? The process is not the hardest, but it still requires some effort and time.
If you absolutely need one of these, then you’ll find no better guide than this. Building up a tilt-over mast will be a piece of cake if you follow this article.
Do you know about the ANT radio? If not find out what it is, how it works?