If you got your hands on a tube radio and plan to keep it, then you’ve come to the right place, because here you’re going to learn how to troubleshoot a tube radio.
You can call them however you like: vintage radios, tube radios, valve radios, and so on.
But one thing is certain: these things have an extraordinary historical value, although their technical capabilities are far exceeded by today’s radios.
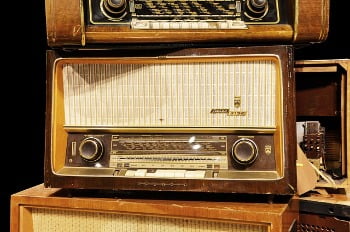
But one of the undeniable advantages of tube radios is their appearance.
You can express your appreciation for the vintage style and for the technology of all times simultaneously, with the help of such a technological jewel.
What Are Tube Radios?
Before getting into details, we must say that they are also very dangerous. Much more dangerous than the radios we are used to.
The voltage of one of these can even reach 1000 volts, which is much more than enough to kill you in an instant.
If you are not willing to work in such conditions, it would be a very wise decision to stay away from such a device.
In any case, tube radio is the name of the radios used in the last century, because they work with the help of several tubes, which we will explain in the next paragraph.
They are also called valve radios or vintage radios, but all these names refer to the same thing.
You can still find these radios online, some of which are from the 1920s. Despite how old they are, they can still work, provided we change certain components. (Spoiler: a lot of components)
What Is The Difference Between Regular Radios And Tube Radios?
If we were to identify some technical distinctions between tube radios and modern ones, the most important would be this: each operation is performed by a tube, hence the name “tube radio.”
So what are these operations? We will list them below.
Radiofrequency conversion is the first operation. To put it simply, the radio picks up the high radio frequency from the air and then converts it to a lower frequency.
This is done with the help of a mixer, which has its own tube.
But, to do so, the radio requires a second radio signal. This secondary signal is produced by an oscillator which – again – has its own tube.
The mixing of these two signals results in an intermediate frequency (IF) signal.
So we’re starting to see a pattern going on. As we said, each tube has its own distinct purpose, and this is the feature that best distinguishes tube radios from those that appeared later.
The next operation is to amplify the IF signal, and this is usually done by several tubes, so by several amplifiers.
Lastly, the last step is sound amplification. As with amplifying the IF signal, more tubes are needed for this operation.
How Much Does It Cost?
Despite the fact that these tube radios can be more than 100 years old, they do not reach a price that could convince you to sell them.
Of course, there are vintage radios from every decade of the last century, starting with the 20s, but you will notice that the prices are never very high.
Judging from what we’ve seen, these radios have an average price of about 30 to 40 dollars, but is it worth getting $ 30 in exchange for a device that is older than your grandfather’s?
Judging by the fact that you are still here, the answer is no. But given these extraordinarily low prices, you can even buy tube radios and restore them, if that’s your thing.
What Are The Most Common Issues Of Tube Radios?
So why do tube radios actually stop working? Sure, they are extremely old, we know that much. But let’s find out what the issues are on a technical level.
If we manage to identify and isolate these problems, we are already a few steps closer to restoring the tube radio, so let’s get into it.
- Faulty tubes
These are the most important components, and some of them will need to be replaced. Luckily, you can still find these on the internet.
- Burnt components
Inside the radio almost any of the components can be burnt, so they must be replaced. The good news is that this doesn’t happen very often.
The bad news is that if it happens, you will have to look for the blueprint of your radio to figure out what burnt.
- Old capacitors
Again, these little things need to be replaced. It doesn’t matter if they still work. Eventually, they will stop working and might damage the rest of your radio.
- Bad speakers
The speakers of some of these old radios are bad and – you guessed it – they need to be replaced.
- Broken antenna
This is easy to fix, as all you’ll have to do is replace the wire antenna.
Again, this is necessary only if your antenna is broken, which you should be able to spot pretty easily.
These are the most common components that need to be replaced on a tube radio.
They may be more numerous, but we have listed the important ones that ensure the operation of the radio.
Also, after replacing everything and plugging the radio in, it is very likely that the radio won’t work perfectly.
You might hear buzzing or humming noises, and you might even smell as if something burnt.
Then again, it is incredibly hard to make a tube radio work perfectly…
How To Troubleshoot Tube Radios – Step By Step Guide
We’ve talked enough about tube radios. Now’s the time to get down to work.
In this section, you will find all the steps that must be followed so that your tube radio works as intended.
One last thing we need to point out is that our guide is considering the All American Five model.
Even if you do not have this model, the steps below should be valid for the majority of tube radios.
Removing the chassis
To access the internal components of the radio, you must first remove the chassis.
Be careful while doing so: we don’t want the components to fall and break. Not before we actually begin at least.
Making a sketch
Before we start making any changes inside the radio, we must first make sure we know the location of each component.
We strongly recommend that you make a sketch on a sheet of paper.
On this, you have to draw the position of each tube, because each of these tubes has a single place where it works.
One tube may fit in place of another tube, but it will only work in its specific place.
Inspecting the tubes
Now it’s time to remove the tubes out of their places. We’re gonna do this manually, but you’ll have to move them a little in order to get them out.
If they are made of glass, it will be much easier for us to examine them and find out if they are broken or not.
If you can see a white smudge inside the tube, it’s very likely that that tube is bad and needs to be replaced.
If the tube is metallic, all you have to do is shake them lightly and listen for noises from inside. Normally, nothing should be heard.
Replace any faulty tubes.
Looking for Burnt Components
After dealing with the tubes, you must inspect the other components and find the burned parts.
To be honest, pretty much anything can be burnt inside there; and if you want to replace that specific part, you’ll need a blueprint of the radio, which you should be able to find on the internet.
Another important thing you need to do is replacing the wax capacitors. It doesn’t matter what condition they are in, but they all need to be replaced.
Note: when replacing these components, never replace them with something of lower voltage spec. Either the same or higher.
Electrodynamic and Permanent Magnet Speakers
Now we need to turn our attention to the speaker. The radio model you have here depends a lot.
Back in the day, they had either electrodynamic speakers or permanent magnet speakers.
If yours has a permanent magnet speaker, you’re in luck, because that one will prove to be much easier to replace. They’re also relatively easy to find.
If, however, your radio has an electrodynamic speaker, it will be very hard – if not impossible – to replace it.
We’re pretty sure that you won’t be able to find a direct replacement. What’s worse, you also can’t replace it with permanent magnet speakers, because they work differently.
You can find some tutorials on the internet on how to solve this issue with some engineering, but it involves a lot of skill and experience with that kind of stuff.
Let’s just hope that your model either has a functional speaker or that it has a permanent magnet speaker, which can be replaced even if it’s not working anymore.
Wire loop antenna
The antenna of these old radios was always in the form of a wire of about 20 meters coiled on the exterior or the interior of the chassis.
So, as you can imagine, it is an easy component to replace. Enameled wire would be the best choice here, but – again – this is only necessary if the wire is broken or damaged.
So before replacing it, carefully examine it and look for any kind of rips and tears.
Plugging the radio in
After you’re done with the antenna, the speakers, the tubes, and the wiring, it’s time to make sure again that all the components are in their proper place.
Once you’re done, it’s time to finally plug the radio in.
We recommend that you unplug it after only a few seconds to make sure that no components inside have burned out.
What do you smell? You’re certainly going to smell burnt dust, but that’s 100% normal and you don’t have to worry about it.
So, if you made sure it didn’t burn any components, try to tune something in and see how well it works!
Note: One last thing we want to mention is that in this guide we have listed only the most important steps.
There are people who prefer to replace other components to improve radio performance.
But we set out to list the steps required for the operation of the tube radio.
If you have implemented our steps, your tube radio should work just fine, although you might hear some buzzing or humming noises.
Frequently Asked Questions With Answers
Q: How do you repair a tube radio?
A: You will need to replace many of their components, such as faulty tubes, bad speakers, broken wire antenna as well as many other burnt components.
Q: Will tube radios still work?
A: Yes, but it is very important NOT to plug them in before you actually do the restoration work.
Read our in-depth tutorial on how to restore tube radios and only then see if your tube radio works.
Q: Why do tube radios sound bad?
A: It isn’t something out of the ordinary for tube radios to sound bad, given how old they are.
Even after replacing the faulty components, your radio could still make hissing or loud humming noises.
Q: What should I do with my old tube radio?
A: Unfortunately, these devices are not very expensive, despite how old and good-looking they are, so selling them might not be the best of ideas.
You could try to repair them, but that takes a lot of patience and technical skill.
Q: How do you test a tube radio?
A: After finishing all the necessary restoration steps, plug your radio in. After only a few seconds, plug it out and do a sniff test.
It should smell like burnt dust, but make sure that smells don’t actually come from burnt components.
Verdict
We hope that our article was useful to you in trying to restore a tube radio.
It is true that these devices have been completely lost and replaced by more powerful ones, but they still deserve the appreciation of those who can recognize the real values of these beauties.
If you have managed to implement the steps explained here successfully, congratulations.
But if you haven’t done your job yet, remember to be very careful, as these radios have a high enough voltage to kill you.