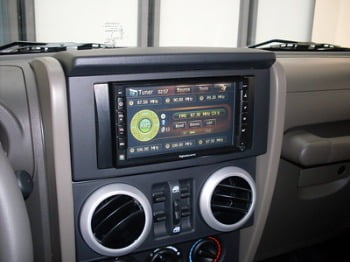
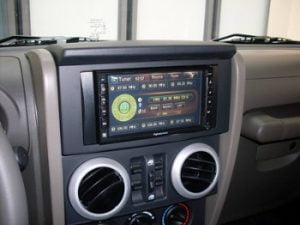
Besides taking care of your demands of entertainment, radios in the Jeep wrangler caters to you with all premium radio services.
Starting from GPS navigation to rearview camera arrangement, and a heap of commands to keep you rolling on the road, the radio will always be your companion.
But problems arise when the radio doesn’t act like your friend anymore!
Wrangler radios have been reported to have their own says as well as don’t act as commanded.
After reaching a certain time and a certain mileage, their objections are pretty normal from the buyers.
When this happens, you might trial and error a lot of harnesses, do a lot of rage kicking; but you’ll be left with no option other than upgrading it, or more precisely, replace it.
Today you’re going to learn all about this very important upgrade, and you’ll also be introduced to a variety of products to help you out.
Let’s start with the basics.
A Comparison Table of 7 Best Jeep JK Radio Upgrade 2025
| Brand Name | Details |
|---|---|
| STINGER Fits 07-18 | |
| Stereo Radio 6.2"Fits 09-18 | |
| Insane Audio JK2001 | |
| MekedeTech B08X1J7FRD | |
| IYING Fits 2011-17 | |
| Dasaita Fits 2015-2018 | |
| Hizpo B01MXHADCG |
When You Need A Jeep JK Stereo Upgrade?
Many have said after 5 years of usage, their radio started acting weird.
And some have reported that after breaking the milestone of 90,000 miles, difficulties occurred.
But in most cases, it all comes down to how well you maintained.
And there are certain problems that if you notice them, you’ll be needing a stereo upgrade.
These problems include, volume not turning on/off or up/down, not receiving AM/FM stations as required.
And even worse, incomplete GPS navigations. Frequent fluctuations of stations have also been objected to.
Cost
The cost usually depends on what type of stereo do you need.
You can choose anything from aftermarket of factory options, the aftermarket ones cost a bit less.
You even have options to have satellite radios, but you’re going to pay extra for the mounting magnetic antennas.
Eventually, several factors encourage the price to go up or down.
But the average cost of a complete radio upgrade kit will charge you at least $1000.
And it will continue to expand if you choose to be on the higher-end side.
However, if you need some professional help, be ready to pay $70 an hour, you better pray that the job gets done within that time!
Time
With all the equipment provided in the kit and a few more that are easily found in the house, even a beginner won’t need more than 45 minutes to get the job done.
And if you are a mechanical expert, you are in luck because you will be needing the time a mechanic does, which is only 20 minutes.
Off-topic, but since it’s a topic of time, make sure that you spend as much time as possible to get your hands on the perfect radio for the upgrade.
Not only looks but spend time taking measurements, dimensions, and all the numbers that might turn out to be super important.
Tools
Most of the components will be provided in the kit, and some of them are normal DIY tools.
- The head unit (don’t get a cheap one; with RCA outs)
- Fit kit (to attach to the bolts and the unit)
- The interface unit (data connection, audio, and USB cable)
- Harnesses
- Add-ons (antenna adapter)
- Philips’s screwdriver
- Prying tools
- Heat shrink tube
- Bolts
Step By Step Guide For Jeep JK Radio Replacement
No matter whatever radio you choose, these will be the steps that will guide you.
Some changes might be required while dealing with new stock radios, but today we’ll emphasize aftermarket stereo systems for the Jeep wrangler.
For your better understanding, we have divided the process into two sections.
The prep section, and the upgrade section.
01. The Prep Section
Here, you have to ensure that everything is ready for an installment.
That includes your vehicle, your new unit, and the harnesses.
01. Flash
To get the new unit or the maestro unit settled up in a new environment, you need to flash it up.
This is a reprogramming section where you might want to add new features or get rid of the old ones.
For Jeep users, this is a unique setup.
And, this whole process will be done with the help of a computer.
02. Harnessing
To get that unit in sync with the radio harnesses you’ll need to deal with a lot of wires.
But don’t frown while seeing all those wires being tangled with each other.
Just trim them off the edges, grab that heat shrink tube and solder them.
After that, connect them based on their color combinations.
If your new unit has RCA outputs, don’t make of anything about those speaker wires yet.
With a mild-sticky tape, sort of glue them together just to keep things neat and not make a mess when you insert that in the system.
03. Mounting
To get a functional mounting piece, attach the plastic straps from the fit kit to place them along the sides of the new unit.
These will provide support and durability.
Now that your wirings and a new unit are ready for installing, why bother waiting!?
02. The Upgrade Section
This section will cover the actions on the operation table, which means throwing the old radio away and making room for the new one.
01. Safety first
Do wear gloves because you’ll be faced with metal/plastic shavings and sharp objects.
Don’t forget to disconnect the battery on the side of the negative terminal.
Make sure that the interior is nice, dry, and clean.
02. Removal process begins
Using a pry tool, remove the part where you insert your CDs, and that should expose a single bolt with a panel down.
Before you open that panel, get your steering wheel motionless in a position in which you can work non-hesitantly and comfortably.
Keep the area as clutter-free as possible.
03. Cluster
So when you open the panel that was attached with the single bolt, you should see the cluster area somewhere a bit below.
In the cluster area, there should be two bolts as well; one on the right side, and the other one on the left.
Screwing them out too, you’ll find a flat surface area, like a tray and that’s where our last bolts will be resting.
04. Remove the dash bezel
To get more space for the tray being glided out, pry off the bezel.
And then get rid of that tray.
05. Make space
After everything has been done and the last four bolts being taken off, you can now finally remove the old, stock radio.
Disconnect all the harnesses from the back.
06. New one in
Hold your breath for a few minutes and trim some of the plastic on the topmost area to get a more defined look.
This will also be helping in mounting by clearing out some space.
Get the new radio in.
As your harnesses are already been readied, they will be ready to go.
For extra security measures, you might throw in some plush fabric to ensure the longevity and cleanliness of the insides.
Now all that’s left is to just try out the new radio experience!
Purchasing Factors Of Jeep JK Radio Upgrade
So, there’s a lot of determinants that will influence the way you choose your radio.
As a concerned customer, you should know what will float your boat.
For some, it will be the radical musical experience, or for some, it will be the perfect navigation system.
Let’s look at the points to get you more interested.
01. Budget
Anything that will look, sound, and perform great will price more, that’s for sure.
Whatever that won’t break your bank will be best known by you.
But budgets may rise if you go for the latest models, double dins, and satellite radios.
There will also be considerations for your other maintenance costs and loans and all the boring stuff so make sure you keep an eye on the monetary section.
But we recommend getting the head unit from a renowned manufacturer, which will save a lot of money on the horizon.
02. Size
Almost all vehicle comes in two universal fits. Single din or double din.
You can go for both, but you will also have to know the prices you have to pay.
If you want to switch from a single din to a double (which happens very often) or the reverse (which doesn’t happen very often) you need to contact the manufacturer, consult with them.
Get the right cutout and mounting dimensions, then trim off some of the parts in the interior, and then get the radio installed.
But apart from the two very distant types, sizes might also vary within the same type.
So, we suggest that you be very careful to eye the dimensions.
Note that, double dins have a larger display, take more space, put less strain on the users’ eyes.
Contrarily, a single din does all the opposites.
03. Music options
CD players aren’t always required, of course.
Has digital media supplanted discs in your life?
A typical CD receiver is one option; another is a larger A/V receiver with a digital display, which does away with the disc and all of the mechanical components.
Make sure your new receiver has a USB port for playing AAC, or WMA files from storage devices, MP3.
As well as an analog auxiliary input for universal connectivity, as these are equally critical.
Apart from the devices, you also have to confirm which musical features you’ll want to see on your new radio.
It may be Apple CarPlay, Android Auto, or Uconnect.
Whatever your preference is, please make sure that the new unit is compatible with.
04. Music strength
Using the inbuilt amplifier in your automobile, the receiver sends the audio to the speakers.
There are methods to measure an amplifier’s influence: peak and average.
In watts, peak power describes however much power an amplifier can generate at its full potential.
The RMS rating alternatively, is a gauge of how much power an amplifier will routinely generate throughout normal operation.
The amp’s total power will also list how many channels it can produce.
The RMS rating, however, is the number you want to watch as you buy, as that indicates the general purpose of the whole experience.
The higher the RMS, the better performance.
But you can also amp up the experience with subwoofers and other external amenities.
05. Signal sources
Another brilliant feature that you might want as your companion in long drives will be the satellite radio stations.
Which makes an exceptional improvement over the traditional AM/FM receivers.
This feature will decode digital signals from satellites of the region and give you access accordingly.
For sports lovers, this will be an amazing benefit.
Also, music lovers, can get iTunes music and also have an option to download/purchase it.
So, what do you think?
What features do you want?
Do you want them all?
Check out the products we’ll be listing now to see what features you’ll want to include.
7 Best Jeep JK Stereo Upgrade Reviews
We have selected seven (only the best) products for you to get an idea about what it takes to make a good upgrade.
We would request you to take a look at the features and then head for the prices.
These are all double-dins, though.
01. Stinger STH10JK


Highlighted features
- Command: touch, microphone
- Size: 10 inches
- Display: LCD; 1024*600
- Connectivity technology: HDMI, USB, Bluetooth
- Equalizer: 15 band adjustable
With Android and Carplay, Bluetooth, Satellite Radio, and Hdtv, you’ll never again be weary on the highway or in your long drive thanks to this vehicle’s wealth of technology capabilities.
You may also rest assured that it has got reliability thanks to attributes like four-camera ports for guaranteed security but also an inbuilt Navigator for guaranteed safety.
Compatible with Wrangler models 2011-18
Pros
- The time alignment system allows the riders to experience music just in the depth they want.
- The Wrangler user panel will provide usability over a long time.
- Not only the audio system is itself extraordinary, but the subwoofer also takes it up a few notches.
Cons
- Some didn’t feel that the display was as vibrant as promised, especially while using the CarPlay.
02. AWESAFE


Highlighted features
- Size: 6.2 inches
- Connectivity technology: HDMI, USB, Bluetooth, Wi-Fi
- Command: touch, microphone (Android 10.0)
- Compatibility: Wrangler 2007-2018
The ability to execute dual applications side by side on the very same screen is termed the split-screen function.
The radio is fitted with the option. Therefore, yes, you may use the GPS while listening to the radio.
The unit has an assembled digital signal processor (DSP), which is a hot innovation to tweak your musical experiences however you want.
Pros
- The new look will not be odd, rather it will blend in with the OEM upholstery.
- The install is pretty nice, so not bothering.
- Compatible with almost any apps from Google Play Store if you are using an Android to connect with.
Cons
- With the small screen, it seems a bit cluttered.
- Even though apps are good with the unit, the functions are quite slow.
03. INSANE AUDIO JK2001

Highlighted features
- Size: 6.5 inches
- Command: Android 6.1
- Compatibility: Wrangler 2007-2017
The setup process is a simple plug-and-play.
No extra harnesses or extra soldering are needed, just confirm your vehicle model to the manufacturer.
With this brand, you can connect any of your phones, be it Android or Apple with the data itinerary you are on, and after being connected, you can find the amenities for yourself!
Pros
- The 9-band eq might don’t seem a lot, but the options are just what you need.
- The navigation is three-dimensional topography-based, so no worries of getting lost!
Cons
- Even though it promises XM compatibility you have to buy external mounting.
- Sudden Bluetooth issues were reported.
04. MekedeTech


Highlighted features
- Screen: 6.2 inches
- Control: Touch, Android 10.0
- Connectivity technology: Bluetooth, Wi-fi
- Resolution: 880*480
- Compatibility: 2007-2018
This system supports MirrorLink, which is huge support especially when you don’t want to go through the trouble of transmitting everything into a unit.
The built-in DSP will get you everything from bass and treble and everything in between, contrarily the split-screen mode will keep it real and not get lost on the musical journey.
Pros
- The approach on the steering wheel will provide easy commanding which might come in handy rather than a touchscreen.
- No issues using everything from Bluetooth to Spotify have been stated…yet.
Cons
- While in the rear mode, the video doesn’t pause for some models, so double-check with the manufacturer.
- You might have to get creative while using some of the apps since it doesn’t support all of them.
05. IYING


Highlighted features
- Size: 10.1 inches
- Compatibility: Wrangler 2011-2017
- Connectivity technology: HDMI, USB, Bluetooth, Wi-Fi
- Display: LCD; 720*1280
- Command: Touchscreen, Android 10.0
The DSP equalizer assembly is a 32-band adjustment so have your DJ party in the Wrangler!
And the allowance of a rear-view camera on the monitor is a feature that will provide backup for the sake of convenience.
With all the features provided, you’ll almost feel like your tablet has been restored in the place of a stereo unit.
This engineering will give you the ‘home-like feeling and not deprive you of any known facilities.
Pros
- The instruction manual is beginner-friendly, and the kit comes with all necessary equipment, so installation will be a breeze.
- Packed with all amazing music facilities, the difference will be more than noticeable compared to the old, stock one.
Cons
- Even though the system faces no trouble playing the apps you desire, it made problems while making calls.
06. Dasaita


Highlighted features
- Size: 10.2 inches
- Compatibility: Wrangler 2015-2018
- Resolution: 1024*600
- Connectivity technology: USB, Bluetooth, Wi-Fi
- Command: Android 10.0
The large screen is undoubtedly a relief for most of the users, the 10-band equalizer with the adjustability, however, will be a great companion for the audiophiles.
If you are within range, the connection will be as seamless as a tethering relation.
You can even connect the unit to your home’s Wi-fi using an antenna.
Pros
- The big fat display makes navigation a lot easier and makes the drive more strain-resistant.
Cons
- You have to play with the installing components and software, both to make the radio play.
- The mic does not work well, you might need to buy a new part.
07. Hizpo


Highlighted features
- Size: 6.2 inches
- Resolution: 800*480
- Command: Android, touchscreen
- Connectivity technology: USB, Bluetooth
- Compatibility: Wrangler 2009-2011
This is also a good unit to make your long drives interesting and worth giving a try.
It does have standard features like equalizers, voice command, and camera or RCA ins and outs.
But admittedly, there is no significant factor in it to wow the customers.
Surprisingly, some features made the customers buy a second set after years of usage of the first one.
Pros
- The sound is a great improvement over the stock radio.
- The look of it allows the vehicle to get a seamless transition from leather to metal and makes the inside look more appealing.
- Navigation is not a problem in this radio.
Cons
- You might face a problem getting station receptions.
- The faulty remote functions can raise a few eyebrows.
Okay, with that, our list ends. Have you come to a decision yet?
The Common FAQ’s of Jeep JK Stereo Upgrade
If you still have questions, why don’t you take a look at our brain team’s work of presumable questions you might ask.
They also might help to grow an insight that could be overlooked easily.
01. Apart from the factor of double dins or single dins, will it matter if I switch decks?
No, it won’t be much of a problem. You just got to plug and play.
But add-on features, if that is what you want to say, then no, you have to amp up your creative and mechanical skills.
Your skills will add up to the succession when you want to add woofers, speakers, or external amplifiers to the unit.
You can get a lot of help from YouTube, or you can just text the model numbers and dimensions to the manufacturer.
02. Will upgrading the radio improve the sound system?
Well, two meanings can be depicted from your question.
One, if you mean switching from stock to factory radios, then yes, you’ll receive a premium quality sound, with amazing new features.
It will be a new experience.
And two, that is, if you are talking about single din and double din.
Single dins are obsolete, yes.
Double dins, will add new dimensions to the older one.
However, as speaking of the sound quality, they will remain the same, or almost so little to realize.
03. Should I buy a set of speakers for once and all?
Choosing speakers for the back doors is just as important as choosing comprehensive speakers for the front doors.
Composite speakers can be installed to the front and the coaxials can be relocated to the back if the situation calls for it.
04. Should I go touchscreen or touch-free?
Evaluate the device’s user interface and the settings on the receiver’s visage.
Although touchscreens are handy, conventional controls are still recommended when riding at speeds ranging above.
It’s the same with a touch panel that takes too long to acknowledge your commands, making you spend more time fidgeting with it instead of focusing on the road.
It’s important to note that steering wheel compliance varies greatly across different automobile models, so do your homework before making a purchase.
05. What are the difficulties I may face when doing an update?
It is easier or more difficult to install a new audio system regarding the type of receiver you purchase.
Because the metal transmitter holding bracket under the stock radio must be dismantled to install a double-DIN receiver, it’s a little tougher.
Only two screws need to be pulled for this to be performed.
To prepare for the new receiver cut the column above the console hole.
It doesn’t take much pruning, and it’s a fine job, so tread lightly.
It’s simple to deal with a single-DIN radio.
Once you’ve mounted the receiver, you’ll need to hook up all of the connections.
06. Is it true that more watts mean more quality audio?
Interestingly, more watts do not correlate to better audio; nonetheless, sound quality is impacted by a combination of variables such as the digital logic, digital-analog adapter, harmonization, and audio input.
When it comes to aftermarket speakers, they sound great with approximately 25 watts RMS and about 50 peaks per channel on most models.
For the most part, higher RMS output is a positive thing because it gives you more volume clearance before the amplifiers’ capabilities are stretched and turbulence starts to sneak in.
However, you’ll want to be careful not to overload your speakers with your amplifiers’ output.
That’s our duty being covered with a full-stop.
Now, it all comes to you to consider what is best for you.
Conclusion
A Jeep jk wrangler radio upgrade is pretty affordable compared to the other part removals and installations.
And the installation process is quite beginner-friendly.
A good upgrade is just enough to amplify a radio experience.
Thousands of streaming options to better navigation abilities will give you everything.
However, it is normal if you still face problems with the upgrade, check out these videos for clearer guidance.
Upgrade for models 2011-2018:
Aftermarket radio installation for models 2011-2017:
Soundbar treatment:
We wish you all the luck for a good purchase and an even better upgrade.
Similar Posts:
- Best 10 Best Aftermarket Radios For Jeep Wrangler (2026 Updated) – Review & Buying Guide
- 11 Best Single DIN Bluetooth Car Stereo 2025 – (Reviews & Buying Guide)
- Top 12 Floating Screen Car Stereo 2025: Comprehensive Buying Guide
- 9 Best Cheap Double Din Car Stereo Head Unit 2026
- 10 Best DSP For Car Audio System – Car Audio Signal Processor Reviews & Buying Guide