As an avid FM radio listener, you will probably need to know how to connect an FM antenna to a receiver at some point in your life.
Making this connection is critical to gaining the best reception for your receiver.
Let’s face it; you wouldn’t want to have static in the background or interference as you listen to your favorite song on your favorite radio station.
Do I need an expert to get my system connected and operational? No, you do not. Connecting an FM antenna to a receiver is a pretty easy task.
All you need are a few tools and equipment to get going. The best part is that the items will not cost an arm or a leg.
Armed with the appropriate tools, you will have your system up and running in no time.
Before discussing how to connect an FM Antenna to a receiver, let’s look at the best way to improve the overall FM reception for your system.
How to Get Better FM Reception for Your Receiver
To understand how to get a better FM reception for your receiver setup, you must understand what makes for a poor FM reception.
Presented below are some of the main factors that interfere with the incoming FM signal.
What Are The Factors That Can Interfere With the Incoming FM Signal?
- Having a directional antenna may limit the signal strength when the antenna position is not in the direction of the FM transmitter station.
- Likewise, having a multi-directional antenna increases the likelihood of interference. Also, having multiple radio stations connected through a single antenna can increase signal deterioration.
- The distance between your local FM station transmitter and your receiver matters a lot. The further away you are from an FM station, the less likely you can receive decent signal strength.
- Conversely, the closer you’re to the station, the greater the possibility your receiver gets overpowered by the transmitter.
- Interference caused by obstruction can weaken the FM signal you receive. Physical objects and materials such as buildings, bridges, and roofs can limit the signal level you receive by absorbing the FM signal.
- Large trees with extended branches cause scattering of FM reception, which can also affect your signal.
- In some cases, transmitted FM signals may bounce off surfaces and reach your antenna at varying times.
- This type of signal reflection can increase the amount of noise in the FM reception.
- Moving vehicles, power lines, communications equipment, and aircraft may harm the quality of signal you receive from your local FM station.
- Most of these pieces of machinery generate electromagnetic interference, which tends to cause interference.
- Having a low-quality antenna, cable, and receiver can increase the level of interference you may experience.
- Some radio equipment may not have the quality to receive FM signals without introducing noise.
- In such cases, the internal electronic parts that make up the device are of low quality.
- Therefore, such inferior parts may create interference that can affect the quality of the FM signal.
How can you limit the factors that affect FM signal quality?
- If you are using a directional antenna, make sure it is facing the right direction. Also, avoid using multi-directional antennas unless necessary.
- If you are using an indoor antenna, you will get the best out of it by installing it next to a window. Doing this reduces the likelihood of interference.
- If your reception equipment is too far from a radio station, installing an amplifier can increase your FM signal strength.
- Conversely, installing an attenuator can reduce the signal strength when your equipment is too close to the FM station transmitter.
- Do not install your antenna where there is a clear obstruction. Remove any hindrance that you can get rid of so that your antenna gets a clear line of sight to the local FM station transmitter.
- Do not trade-off on the quality of your equipment. Buying a decent antenna and a receiver saves you a lot of trouble.
- Periodically check all the cables that connect your system for damage. Damage to the outer covering of wires can quickly introduce noise into the receiver radio system.
How To Connect FM Antenna To Receiver (Do It Yourself)
Connecting an FM antenna to a receiver is an easy and fun activity to do alone or with the kids. All you need is the right equipment, tools, and a step-by-step guide to getting you through.
Can I use any tool or equipment to get my FM radio system going?
Using the wrong tools and equipment can keep you exhausted and unable to achieve what you set out to do.
Required Tools and Equipment
The tools and equipment that you need to connect an FM antenna to a receiver include the following.
- A set of pliers.
- A set of screwdrivers.
- An antenna.
- A receiver.
- Suitable cabling.
- Clips.
- Trucking pipes.
- A ladder.
Set of pliers
- You will need a set of pliers with at least three types. You will need a conventional plier, a cutting plier, and a long-nose plier.
- The conventional plier is suitable when twisting strands of cable.
- The cutting plier is convenient for cutting cables and other items.
- The long-nose plier allows you to work with wires in tight spaces that may be hard to reach.
- A basic set of pliers costs a little over $20. A premium set may likely cost more than $50.
Set of Screwdrivers
- You will also need a set of screwdrivers to screw on and unscrew screws onto surfaces and equipment.
- If you cannot get the whole set, you should make sure to have at least a flathead and star screwdriver since most screws come in either of these shapes.
- You can get a decent set of screwdrivers for as little as $10.
Antenna
- Having a suitable antenna is essential to the success of your project. In general, there are two types of antennas you can choose from: indoor and outdoor antennas.
- Try to use an outdoor antenna when installing your FM setup as outdoor antennas tend to be better than their indoor counterparts. Additionally, an outdoor antenna can either be directional or omnidirectional.
- A directional antenna can only receive FM singles transmitted towards the antenna beamwidth. This type of antenna usually has high levels of gain, thereby providing your receiver with a strong FM signal.
- Therefore, using this type of antenna may be more suitable when the FM transmitter station is further away from your location.
- An omnidirectional antenna, on the other hand, can receive FM signals from all directions. However, the versatility of this antenna significantly reduces its gain.
- As a result, you will likely get weaker signals if you connect your receiver with an omnidirectional antenna.
- Nonetheless, you may want to connect your FM system with this type of antenna when you’re a short distance away from a radio station.
- If your setup sits in an urban area – where having an outdoor antenna may be quite the hassle – having an indoor antenna might be best for you.
- The key here is to have a high-quality indoor antenna that is least affected by the numerous signals that exist within a typical urban setup.
- Indoor antennas are of two types: amplified and unamplified indoor antennas.
- Amplified indoor antennas usually provide strong signals. However, having such strong reception comes at a price.
- A significant amount of noise gets into the system, which makes for a not-so-pleasant radio set up to listen to.
- Unamplified indoor antennas are of two types. These antennas are the bidirectional dipole and half-wave vertical antenna.
- The cost of FM antennas widely varies. Indoor antennas can be as cheap as $7, while an outdoor FM antenna can cost almost $90.
- The cost of each type of antenna generally depends on its quality, brand, and type.
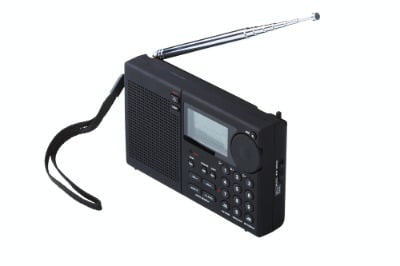
Receiver
- An FM receiver is an electronic device that demodulates an FM signal into an audio signal.
- Your receiver should get its power from a set of batteries or by connecting it to an electrical outlet.
- Most receivers consist of series of filters and amplifiers to refine the demodulated audio signal.
- A receiver will likely have multiple input/output interfaces at its rear end, which allows you to connect amplifier systems, speakers, and other sound equipment.
- The cost of an FM receiver varies depending on the brand and its output power. A typical high-quality 500W FM receiver can cost between $70 to $100.
Cabling
- In general, three kinds of cables are used to connect FM antennas to receivers. These types of cables are 300 Ohm cable, RG59/U coaxial cable, and RG6/U coaxial cable.
- The 300 Ohm cable is a twin-lead cable that has been used for ages. It has a low energy loss ratio.
- However, you will probably need a male antenna matching transformer connector to connect your antenna to the receiver.
- RG59/U and the RG6/U are both 75 Ohm coaxial cables. The RG6/U coaxial cable works like the RG59/U cable but gives fewer overall losses.
- A decent length of an indoor 300 Ohm cable will not cost you more than $10. Likewise, a male antenna matching transformer connector will not exceed the same price tag.
Clips, Trunking Pipes, Ladder, and Others
- Using clips or trunking pipes lets you neatly arrange your cables.
- A ladder may be necessary if you need to work on the roof.
- You can also provide other tools such as adhesive tape. Keep close to you any item that you think can make your installation easier.
What to learn more about how to improve your FM reception? Check out this video;
Step by Step Guide on How to connect an FM Antenna to a Receiver
Connecting an FM Antenna to a receiver does not require enormous technical expertise or a degree in electrical engineering.
With the right tools at your disposal, you can save money and DIY. This simple step-by-step guide will let you connect your FM system within the space of an hour.
Step 1:
Plot out where each piece of equipment should go. Be sure to purchase an adequate length of cable. The amount of cable you need will depend on the distance between the FM antenna and your receiver.
Step 2:
Make sure you have all the listed equipment and tools that are necessary for a successful installation.
You may find the setup process difficult if you have to go out and purchase the things you need while you’re installing your FM system.
Step 3:
Install your antenna in its intended location. If you are using an indoor cable, you can just place it by your window or on top of the receiver.
Installing an outdoor cable might be a bit trickier especially if you’re afraid of heights. Nonetheless, you can easily install an omnidirectional outdoor antenna at the base of your roof using a ladder.
Step 4:
Connect one end of the 300 Ohm cable (or any other cable) to the antenna and run the cable to the receiver. Use the set of pliers to peel and cut throw cables where needed.
You may want to clip or pipe your cable so that your installation can look neat and tidy. However, the use of clips or trunking pipes is optional.
Step 5:
In the case of a 300 Ohm cable, connect your cables to a male antenna matching transformer connector using a screwdriver. This connector directly connects to the FM slot at the back of your receiver.
Step 6:
Double-check all your connections to ensure that everything fits as it should.
Step 7:
Finally, power your receiver and tune to the frequency of the FM station you want to listen to.
To learn more about how to connect an FM antenna to a receiver, check out this video.
Verdict
The process of connecting an FM antenna to a receiver is quite easy. On a scale of 1 to 10, the difficulty level of setting up this system stands as a 4.
All you need are a few tools and equipment. It gives you a fun activity to do with your kids.
The basic tools you need to get the job done are mostly pliers, screwdrivers, and a ladder. You will also need to have an FM antenna, a roll of cable, and a receiver.
With these items, you can quickly connect an FM antenna to a receiver in under an hour.
Similar Posts:
- Top 14 Best Long Range Omnidirectional TV Antennas in 2026 (Reviews & Buying Guide)
- 11 Best Marine TV Antenna Reviews in 2026 – Buying Guide
- Top 10 Best Indoor TV Antenna For Metal Roof 2026 (Buying Guide)
- How To Easily Build a Homemade FM Antenna Booster
- Micropower Broadcasting: A Technical Primer (How to Start a Micro-Radio Station)