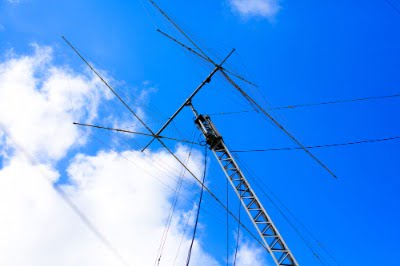
Ham radio antenna grounding is an important topic an amateur radio operator needs to clearly understand.
In case this topic sounds strange to you, or you have heard people talking about it in the past, and it still seems unclear to you, this article will explain all you need to know about this topic.
Antenna grounding is a good practice, everyone, with ham radio and other electrical appliances that make use of antenna must adopt.
This process is very crucial to guarantee your home appliances’ safety by shielding them away from the effect of lightning.
If you are thinking of installing an antenna on the roof of your home anytime soon, make sure you ground both the antenna coaxial and the mast as soon as the antenna installation is complete.
When your ham antenna is rightly grounded, this guide against static charge buildup by acting as a blockage for dangerous electrical surges and spikes, thereby eradicating the possibility of shock hazard.
The process involved is easy. Basically, it entails extending a strong copper wire from your antenna mast and coaxial cable and connecting these wires to your house service ground.
You will find out how you can ground your ham radio antenna in few steps as you read further.
Does a Radio Antenna Need Ground?
The answer to this question is YES! Every outdoor radio antenna needs to be grounded, irrespective of the build material or quality.
For instance, even antennas that are built with plastic comes with inner metal.
Since every antenna is made of electricity, in a situation where a bolt of powerful lightning hits your house or the one next to you, an antenna attracts the lightning faster.
If your antenna is not grounded, this can cause electrical shock or hazard.
Grounding your antenna makes it safe for use. This helps to reduce possible damage that may result in a fire outbreak when hit by lightning.
How Grounding Improve Reception?
Sometimes, grounding your antenna may improve the reception in some very rare situations, maybe not outstandingly, that it may become hugely evident.
For instance, if your antenna is unbalanced, grounding it may improve its performance or enable it to operate efficiently and optimally.
Also, grounding eliminates electromagnetic interference. Normally, all electrical appliances leak small or undetectable amounts of current.
In a situation where this current is left unchecked or unobstructed, it travels through the antenna’s cable. In the end, this may create noise, which may eventually interfere with the reception.
That being said, the primary reason ham radio owners need to ground their antenna is to guarantee their safety and that of their home appliances.
Ham Radio Antenna Grounding Process DIY
Generally, the process involved in grounding an antenna is not complex. With the right tools and steps to follow, it is what everybody can accomplish.
This section will discuss the steps to follow or take to ground your antenna without relying on an expert.
- Find your house service ground wire. This wire is normally positioned very close to your house’s electrical meter.
- In some cases, you may find it very close to your breaker panel.
- Watch closely for a thick gauge copper wire with its head pointing out of the ground to identify this wire.
- Connect the antenna ground wire to the house service ground wire. Ensure the antenna ground wire is bigger than 10 AWG but not as big as the house ground wire.
- You need a clamp to secure this connection. Ideally, the house ground wire should be around 2 AWG.
- So, get a clamp that can conveniently connect a 2 AWG wire with the size of antenna ground wire you eventually settle for (8 and 6 AWG are great choices). In essence, ensure the copper wire you intend to use is solid enough.
- Now, it is time to connect the antenna coaxial to the antenna ground. So, extend the other end of the antenna ground wire, and connect it to the coaxial grounding block.
- The block has 2 female coaxial connectors (one connector connects the coaxial that links to the antenna on the roof or pole, and the other coaxial goes inside the house).
- There is also a slot where you can connect the ground wire. Make sure you connect the cables horizontally at the coaxial ground block connectors. This prevents water from entering into the cables.
- Now that the coaxial cable is grounded, the next thing is to ground the antenna pole or mast.
- The process involved is easier than the one explained for grounding the antenna coaxial.
- Get an 8 AWG copper wire. 10 AWG copper wire is also a great choice in case you can’t find the 8 AWG.
- Connect one end of the copper wire to the antenna mast with the aid of a mast ground clamp.
- Then, extend and connect the other end to the house ground.
- Now that you have successfully grounded your ham radio antenna, you must test the antenna to ensure everything is working absolutely fine.
Make sure you use two different clamps- one to ground the antenna mast to the house ground, and the other one to ground the antenna coaxial accordingly.
Also, the ideal or perfect way to ground your antenna is through the house service ground.
Tools
- Copper wires
- 2 Clamps (ground & mast clamps)
- Coaxial grounding block/ coaxial lightning arrester
- Coaxial cables
- Compression fittings
Time
Provided you have all the tools you need and are conversant with electrical work, the antenna installation and grounding process can last for about 2 hours on average.
It is a great idea to ask for help while executing this task to attain a high-efficiency level.
Talk to a friend or family member who may be willing to help you through the process since there is a lot to do- climbing, wire connection, and many more.
Cost
The standard antenna grounding process or operation is a bit pricey. On average, you may spend up to $200 on a simple installation- DIY.
If you are paying a professional to carry out the installation for you, this price will increase by about $100. You need to understand that no matter how much you spend, it is nothing compared to your health and safety.
Do’s and don’ts
Do’s
- Get all the necessary tools and materials ready before you start the grounding exercise
- Ensure you make use of the right cable and wire
- Make use of copper wires that are long enough- that can extend easily from point A to point B (from the antenna mast to the house ground)
- Make sure you ground both the antenna coaxial and the mast
- Ensure you invest only in top-quality installation tools or materials
- Follow the specification for each tool and materials
- If the DIY process appears complex or uninteresting to you, talk to an expert to carry out the grounding for you instead of attempting it yourself
- Ensure you go through the rules and regulations in the state or province you are living about antenna grounding
- Make use of compression fitting to prevent water leakage into the coaxial
- Ensure screws and clamps are well tightened wherever necessary to avoid possible fall off
Don’t
- Don’t attempt a DIY if you do not have prior experience of electrical work
- Make sure your choice of copper wire needed for the grounding process is not as thick as the house ground wire
- Avoid using the same clamp that connects the coaxial to the house ground for mast grounding. You should use a new clamp to connect the mast to the house ground for effective antenna mast grounding.
- Don’t conduct the antenna grounding process on your own if you are not convinced you have enough skill for the task
- Don’t forget to ask for help. You will definitely need someone to assist you with the antenna installation and during the grounding task.
FAQ’s Ham Radio Station Grounding
Where can I get wires and clamps from?
You can get these materials from an online store, especially from sellers on Amazon.
Before you eventually decide to purchase from a vendor, make sure the quality of these materials is excellent.
You can read other buyers’ reviews and only make a purchase if you are satisfied with what you read. A low-quality wire can become fragile and weak after some time.
What is the best 10 AWG copper wire for antenna grounding?
There are several top-quality designs and brands on the market to choose from when you want to invest in10 AWG.
Based on reliability and performance, you can invest in CIMPLE CO 10 AWG top-quality copper wire.
How many copper wires do I need for antenna grounding?
You need 2 copper wires altogether. Ensure these wires are not as thick as the ground wire.
While the house ground wire thickness is between 2 and 6 AWG, consider a wire with a thickness of about 10 AWG for your antenna ground wire.
What is the difference between a coaxial grounding block and a coaxial lightning arrester?
These are the two types of grounding blocks. The main function of these tools is to ground the coaxial cable of your antenna.
While they perform the same operation, the situation that surrounds their application is a bit different. Suppose your house is likely to be impacted or affected by direct lighting strikes.
In that case, you should make use of the coaxial lightning arrester than the regular or standard grounding block.
The lightning arrester is more stylish and comes filled with gas that ionizes whenever there is a high voltage spike by ensuring the surge goes straight into the ground. A popular brand is GIMILINK lightning arrester.
What are the alternatives to house service ground wire?
In case you can’t find where the house service ground wire is located in your home, there are some other alternatives that you may adopt or try out. You can look for a water pipe that has about 10 feet of metal buried under the ground.
You can also drive about 8 feet metal rods into the ground and use any of them as your grounding spot.
That being said, house service ground wire remains the best.
What is the best approach to coaxial cable installation?
Coaxial cable installation is an easy process. The steps involved include cutting the cable and the attachment of the connectors to both ends of the coaxial cable.
You will need a cable cutter, wire stripper, male connectors, and a crimping tool.
Make sure you check the type of coaxial cable you are going to use for the antenna installation. An RG-59 cable or RG-6 cable is the widely used cable.
Whenever you are ready to pick up a cable, the first thing you must do is check the cable carefully- you will see the cable type boldly written on it.
How high should a ham radio antenna be installed or erected?
If you live in an apartment that is not on the high floor, you need to install an indoor antenna to get a clear signal on your ham radio.
Basically, the higher your antenna is mounted or placed, the better the signal quality. Make sure your antenna is about 30 feet off the ground level for best performance.
Verdict
So far, we have discussed the concept of ham radio antenna grounding and the steps you need to take to execute this task on your own.
If you do not have an electrical background or haven’t been involved in electrical work in the past, ensure you follow the steps carefully and understand what you are expected to do at every stage of the task.
Remember, the primary purpose of engaging in this activity is to guarantee safety. Knowing this fully well, you won’t want to take chances.
In case you are not confident enough or the DIY instructions seem complex for you to execute, we advise you to reach out to a professional or expert who is experienced enough when it comes to electrical work and antenna installation.
Do not forget to go through the rules and regulations that guide antenna grounding in your state or region to ensure full compliance.
Similar Posts:
- 11 Best Marine TV Antenna Reviews in 2025 – Buying Guide
- How To Build A 40′ Antenna Mast: Step By Step Guide
- 9 Best Dipole Antenna of 2025 – A Comprehensive Buying Guide
- Top 14 Best Long Range Omnidirectional TV Antennas in 2025 (Reviews & Buying Guide)
- How To Build A Dipole Antenna – Simple DIY At Reasonable Budget
Great article on grounding an outdoor antenna. Just what I was looking for. My first station was not grounded well and I learned a very expensive lesson. Ground it well or risk loosing all your equipment and possibly being hurt.